It can be really thrilling to plan a renovation for your bathroom. We are here to provide straightforward ideas and advice for a seamless redesign since we understand that all of the details, from selecting tile patterns and light fixtures to plumbing fittings and more, might seem overwhelming.
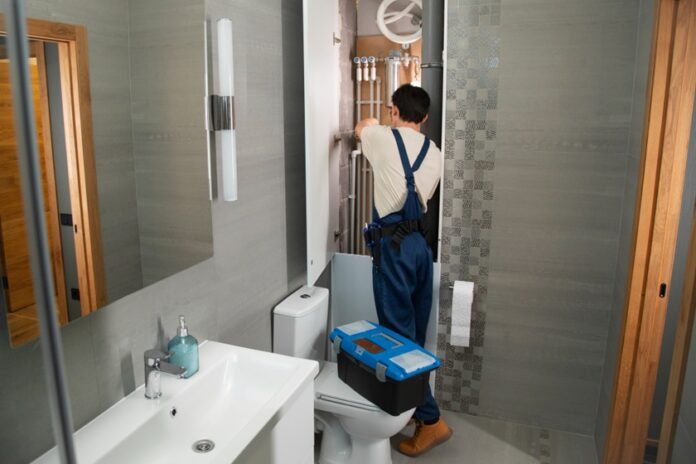
What you can and cannot do when remodeling your bathroom can frequently be attributed to the plumbing in your house. By ensuring that you are buying the appropriate materials for the available area, speaking with a plumber before beginning your bathroom makeover will help you save both time and money.
Compared to modern standards, certain residences constructed before 1980 typically have thinner water supply pipes. For you, what does this mean? The amount of water that may be provided to your new shower head with numerous heads may be limited by narrow supply pipes. Before remodeling, it’s vital to have an idea of what you have so that you can get the right fixtures. Another thing that is hard to adjust without incurring significant expenses is the location of the drains.
In this article, we will share with you the detailed steps for Renovating Your Bathroom and also we will tell you what thing you need to first consider in the process of Renovating Your Bathroom.
Fix a reasonable budget for the bathroom renovation
To decide what type of bathroom updates you want, the first thing you have to consider is your affordable spending limit. While the average spend in Australia on a bathroom renovation is around $26,000 as of 2023 but you can also update your bathroom on a budget of $5,000 or less.
Of course, your budget and personal preferences will ultimately determine how much you spend on your bathroom renovation. More specialized features (such as specially designed showers, bathtubs, or light fixtures) will ultimately result in higher material and installation costs.
For your budget planning, you should focus on these things
- Fixtures
- Tiling
- Plumbing
- Electricals
- Waterproofing
Determine project scope & timeline for bathroom renovation
All eyes are focused on the question, “How long does it take to renovate a bathroom?” It’s critical to remember that the size of your bathroom renovation project will dictate how long it takes to complete. When preparing a bathroom remodel, there is more to consider than what first appears. A complete rebuild or renovation of a bathroom might take several weeks, while a simple refresh of the design will be more cosmetic in nature and take less time.
To assist you in choosing the kind of project you are working on, here is a brief checklist for bathroom restoration for you.
Redesigning a small bathroom: about 30 days
- Change the faucet or vanity.
- Modernize the plumbing in the shower
- Change the light fittings and wall sconces on the vanity.
- Apply paint, wallpaper, or fresh ornamental finishes.
- Include additional, attractive storage
Full bathroom renovation or remodel: 6-12 weeks, full bathroom renovation could require mechanical, plumbing, and cosmetic work.
- Move the electricity, plumbing, etc may take 6 to 12 weeks
- Expand the area and/or reposition the walls
- Replace the field and ornamental floor tiles in the bathroom.
- Upgrade your shower or bathtub.
- Include features for the shower, such as heated floors.
- Add polished glass and more luxurious elements.
Your Complete Bathroom Renovation Guide
STEP 1. Determine Your Interests
Knowing what you want is the first step in beginning a bathroom renovation. Investigate several designs to find the one that speaks to you. Go through catalogs, stop by showrooms, browse internet inspiration sites, and even read our blog about different kinds of bathroom fixtures. Take note of the layouts, colors, and designs that grab your attention.
Consider the aspects of your present bathroom that you enjoy. Is it in a crisis of updating, or are you thinking of something completely different? Occasionally, little adjustments like new fixtures or tiles might transform the area sufficiently to avoid a complete renovation.
When making layout adjustments, take into account how they will affect the plumbing for showers, sinks, and toilets. For thorough drawings, it can be beneficial to hire an engineer or architect, especially to comply with state building laws and requirements, such as minimum spacing between fixtures.
STEP 2. Hire a Good Team For This
Putting together the ideal team is essential to making your ambitions for bathroom makeovers a reality. Determine the kinds of contractors you will require first; these will usually include a builder, tiler, waterproofer, electrician, plumber, and painter. To locate reliable experts, ask friends for suggestions or check internet reviews! Check their references, experience, and licensing and insurance status.
STEP 3. Start your main work
This involves taking down outdated surfaces, tiles, and fixtures and knocking down any unnecessary walls. This relates to shower-equipped bathrooms and includes removing the bathtub and doors. You may decide to put these things away for later use. If so, make sure they’re completely cleaned and dried to avoid long-term moisture damage.
For obvious reasons, your selected contractors will also make sure to turn off or cap all water inputs during this time, as well as disconnect all electricity!
STEP 5: Rough-In Plumbing
Installing electrical and plumbing fixtures is the next important phase in remodeling your bathroom. The plumber makes holes in the wall studs of houses made of wood in order to run pipes and ensure drainage and supply at the necessary points. Plumbing requirements are usually accommodated via pre-made holes when utilizing steel frames. Pipes must be firmly secured to the frame in order to avoid a “water hammer,” which over time might result in mechanical damage.
Planning for power outlets, lights, and any other electrical needs is part of the electrical rough-in process. Any significant modification to wall studs for electrical wiring, similar to plumbing, needs to be reinforced or repaired to preserve structural integrity. Before completing the wall setup, electricians meticulously arrange and mark the locations of the fittings to guarantee precision.
These two procedures establish the fundamental framework for your bathroom, guaranteeing its operation and adherence to Australian requirements.
STEP 6. Installing Wall and Floor Tiles
Tiling comes next after the fittings are installed. Skilled tilers will completely change your area, whether they recreate the original design or stick to the current one. They will carefully measure and arrange the space, utilizing premium, long-lasting, and low-maintenance tiles that are appropriate for the particular requirements of a bathroom setting.
STEP 7. Install countertops and cabinets
Functionality and design collide when countertops and cabinets are installed. Your team will help choose the appropriate materials that strike a balance between style and functionality. Choosing pre-built or custom-built cabinets will guarantee a smooth integration into the overall design of your bathroom. Stone is a popular choice for countertops because of its exceptional aesthetic appeal and unmatched durability. Countertops are selected for their stability and ease of maintenance. Because it is less expensive than stone, laminate is also a popular option, but it is not as durable.
STEP 8: Install fixtures for plumbing
Installing new plumbing fixtures—the sink, toilet, shower, and bathtub—usually comes next after demolition. The required plumbing lines will be run by your selected plumber, which may require drilling through external walls or studs.
STEP 9: Fit Accessories and Lighting
Installing bathroom accessories and lighting fixtures is part of this. This is an important stage in determining how your remodeled bathroom will feel and work. Every component, from stylish and useful lighting to necessary extras like towel stands and toilet paper holders, is thoughtfully chosen and fitted to blend in with the overall aesthetic.
STEP 11: Finish Up and End the Day!
The last step is to give your new bathroom a thorough cleaning to make sure it is perfect after the final inspection. Even though the contractors will clean your bathroom mostly, there will always be some more work to be done before it is spotless and ready for use.
To begin, remove any building items and sweep or vacuum the area to get rid of any dust or dirt. Using the proper cleaners, thoroughly clean all surfaces, such as tiles, fixtures, cabinets, and worktops, in order to eliminate any installation marks. Wash and shine every fixture, including shower heads, and faucets. Concentrating on the grout lines and the vicinity of the fixtures, mop the floor. Ensure that every surface is dry and secure for use, creating a non-slip atmosphere.
Importance of Bathroom Plumbing Renovations
Renovations to the plumbing in your kitchen and bathroom are not just pleasing to the eye but also they are essential to the general efficiency, usefulness, and value of your house. Making informed judgments and optimizing the advantages of your home improvement project can be facilitated by having a clear understanding of the significance of plumbing renovations in these crucial areas.
1. Improved Efficiency:
Inefficiencies resulting from outdated plumbing systems can affect your daily schedule. Smoother water flow is ensured by updating fixtures, appliances, and pipelines, which lowers the possibility of leaks, clogs, and low water pressure.
2. Preventive Maintenance:
Remodeling offers a chance to take care of underlying plumbing problems before they get worse. It is possible to prevent leaks or burst pipes that could cause major water damage and expensive repairs later on by replacing old pipes or rusted connections.
3. Water Preservation:
Plumbing renovations offer a chance to include water-efficient solutions in a time when environmental awareness is vital.
4. Improve Health and Be Safe
Improved drainage and fixtures in your bathroom can help you maintain better health and hygiene. An atmosphere that is safer and cleaner is produced by well-ventilated areas and well-running drains, which lower the possibility of bacterial growth, mold, and mildew.
Budget-Friendly Plumbing Updates for Your Bathroom Renovation
In this part, we will give you some budget-friendly ideas for your bathroom renovation.Without doing a complete makeover, you can add additional style and functionality to your bathroom with these easy design improvements and little renovations.
- Hang Bathroom Wallpaper
- DIY Vanity Upgrade
- Tile a Bathroom Backsplash
- Accessorize with Color
- Try a Two-Tone Paint Treatment
- Hang a Bathroom Mirror
- Swap in a Secondhand Find
- Replace Light Fixtures
- Paint Bathroom Cabinets
- Swap Out a Vanity Countertop
- Add White Accessories
- Swap Out Shower Fixtures
- Incorporate Convenient Storage
- Hang a New Shower Curtain
How to Make Eco-Friendly Bathroom Renovations
Besides being guilt-free, going green can improve the health of your bathroom, reduce your monthly expenses, and increase the value of your house. Additionally, it provides the chance to obtain LEED ( Leadership in Energy and Environmental Design ) points from the US Green Building Council (USGBC), a group committed to a more sustainable and environmentally friendly future.
Green homes with LEED certification are healthier for you and your family and require less energy and resources. Through its numerous programs, USGBC offers homeowners and residential and commercial builders the chance to earn LEED points.
Here are 5 ways in which you achieve an eco-friendly bathroom.
1. Use a water-saving faucet aerator.
2. Use sustainable materials for new construction and remodeling.
3. Install a water-saving showerhead
4. Install a high-efficiency water heater
5. Install a low-flow or dual-flush toilet.
Ref:
https://www.mooddesignbuild.com/blog/bathroom-renovations-101
https://dcmplumbing.com.au/how-to-renovate-your-bathroom/
https://www.bhg.com/bathroom/remodeling/projects/quick-bathroom-updates/
https://www.oatey.com/faqs-blog-videos-case-studies/blog/five-meaningful-ways-create-eco-friendly-bathroom


